The first time you log
in to Menu Analysis, the plate grid located on the ![]() page is blank. As you start creating new
plates, the application displays them in the plate grid. You can group
them into menus (see Creating
and Editing Menus). Use the Plate
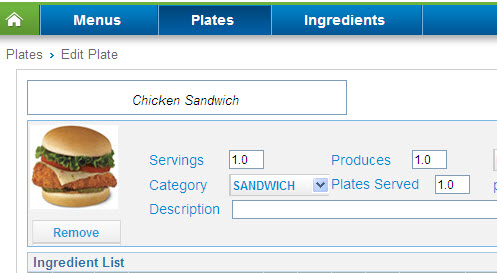
details screen
to create plates by adding Sysco products, custom ingredients, and
existing plates.
page is blank. As you start creating new
plates, the application displays them in the plate grid. You can group
them into menus (see Creating
and Editing Menus). Use the Plate
details screen
to create plates by adding Sysco products, custom ingredients, and
existing plates.
To add a plate
From the Menu Analysis
homepage ![]() ,
click the
,
click the ![]() button.
button.
Select the Create a new Plate radio button.
Type a name for your new plate in the Enter Plate Name field.
Click the ![]() button.
The Plate details screen displays, where
you can continue customizing your
plate.
button.
The Plate details screen displays, where
you can continue customizing your
plate.
You can also add a plate
from the ![]() page
by clicking the
page
by clicking the ![]() button.
button.
To delete a plate
From the ![]() page, select the checkbox
page, select the checkbox ![]() next to the plate to delete.
next to the plate to delete.
Click the ![]() button. A confirmation window displays.
button. A confirmation window displays.
Click Yes to delete the plate.
![]()
Return to Plate Management